BASIC BLOGGER GUIDE – CREATE A BLOG, WRITE A POST, ADD AN IMAGE
Many people are aware of blogs and want one for themselves,
but not really sure where to start. The fear of the unknown keeps them from
finally taking the step and getting a blog for themselves. This post is a very
basic guide to how to create a Blogger blog for yourself and creating your
first post and adding an image to it. The post also explains the procedure to
add video and finally a brief outline on customizing the layout. The steps are
outlined below.

1.CREATE A BLOG
To start a blog with Blogger, visit the Blogger homepage, enter your username and password, and click Sign in. Enter a display name and accept Blogger’s Terms of Service. Then click the Create a Blog link and get started!
Pick an address (URL) and a blog title. Then, choose your favorite blog template (this is how your blog will look when you publish it). Now get creative, add information to your personal profile, and customize how your blog looks, if you feel up to it. Start blogging now!
Pick an address (URL) and a blog title. Then, choose your favorite blog template (this is how your blog will look when you publish it). Now get creative, add information to your personal profile, and customize how your blog looks, if you feel up to it. Start blogging now!
2.WRITE YOUR POST
Once you’ve signed in to Blogger, you’ll see your dashboard with your list of blogs. Here’s what you need to do:
a. Click the orange pencil icon to write a new post, and enter anything you want to share with the world.
b. Next, you’ll see the Post Editor page. Start by giving your post a title (optional), then enter the post itself:
b. Next, you’ll see the Post Editor page. Start by giving your post a title (optional), then enter the post itself:
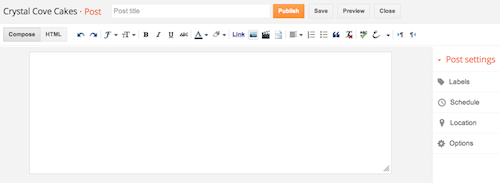
When you’re done, click the Preview button at the top to make sure it’s ready to go, and then click the Publish button to publish your post.
3.ADD AN IMAGE
You can add an image from your computer or the Web to your blog. Click the image icon in the Post Editor toolbar. A window appears prompting you to browse for an image file on your computer, or enter the URL of an image on the Web.
Once you’ve selected your image, you can then choose a layout to determine how your image will appear in your post:
a. The ‘Left’, ‘Center’, and ‘Right’ options allow you to customize the way your blog text will flow around your image.
b. The ‘Image size’ options will determine how large the image will appear within your post.
b. The ‘Image size’ options will determine how large the image will appear within your post.
Click UPLOAD IMAGES to add your image, and then click DONE when the notification window appears telling you that ‘Your image has been added.’ Blogger will then return you to the post editor, where you’ll see your image ready to be published to your blog.
4.ADD A VIDEO
To add a video to your blog post, click the film strip icon in the Post Editor toolbar above where you compose your blog text. A window appears prompting you to ‘Add a video to your blog post.’
Click Browse to select the video file from your computer that you’d like to upload. Note that Blogger accepts AVI, MPEG, QuickTime, Real and Windows Media files and that your video must be less than 100MB in size.
Before uploading your video, add a title in the ‘Video Title’ box and agree to the Terms and Conditions (you’ll only have to do this the first time that you upload a video with Blogger). Then click UPLOAD VIDEO.
While your video uploads, you’ll see a placeholder in the post editor showing where your video will appear. You’ll also see a status message below the post editor letting you know that your upload is in progress. Depending on the size of your video, this usually takes about five minutes. When it is complete, your video will appear in the post editor.
5.CUSTOMIZING YOUR LAYOUT
Your template is a fun way to customize your blog. When creating a new blog, you’re first asked to choose a default template, this is the basic design of your blog.
You can choose from many Blogger templates for your blog; simply pick the one that best fits your needs.
You can choose from many Blogger templates for your blog; simply pick the one that best fits your needs.
Source: Blogger.com
COPY FROM : RayTemplates in Blogger, Tutorials


.jpg)


0 comments:
Post a Comment